B 4 blessings.....my 4 boyssss

Wednesday, September 7, 2011

You Have My Heart On A String

 Ah yes, my sweet son does surly have my heart on a string.  Mcauley is turning 16 tomorrow and I just had to do a layout of him as a baby...therepy I guess...the years have gone too swiftly.  I am so very proud of my dear son...he is the best son a mother could ask for and I am so very proud and blessed to call him mine.
I've used Tim Holtz Vintage Shabby paper stash for this layout.
 My hearts are cut from Sweethearts...love the punched scallop edge...I've added stitching and some lace to some of the hearts...part of the title is computer generated, cut apart, and inked.  I've added some additional stitching randomly to the circle frame.  I cut my circle with Plantin Schoolbook....@ 9 1/2 inches with the center point on and then @ 9 1/4 inch with the center point on...this makes it easy to cut the narrow circle frames for you layouts.  I' ve also used the center point to cut my squares from the middle of my papers.
 Sentimental frames accent the grunge letters that spell out my and heart...I've added picket fence crackle paint to the the title.   I've also added deminsional paint to the frames to give them some depth.
 The butterflies are from Sentimentals...inked and pearl accents added....all of my flowers are from Mothers Day Bouquet and the leaves are from A Child's Year...I've poked a hole in the corner of the photo and the photo mat and added a little charm held by a piece of string....
 I've used string to 'write' string....just ran the string through some glue....spelled the word, let it dry...and viola....a string font all of my own....I've also added a little heart charm to the g.
 Martha Stewart edge punch on the sides of the paper strip.....
lots of lace and the same Martha Stewart punch in the corner variety...

hope you enjoyed my little project...have a great day....thanx for stopping by!

Sandy

Sunday, September 4, 2011

Anchored In LOVE....Explosion Photo Box/Card

 I had so much fun making the explosion box for sis I decided to make one for my sweet son.  Mcauley is turning 16 on Thursday...is that even possible?
 So anyway...in case anyone has never made one of these I wanted to let you know some measurements as I tried to keep these as simple as possible....My papers are  2@ 12x12  1@ 9x9 and  2@ 6x6....numbers easily divided for scoring....the 12x12 page has two papers put together with adhesive, wanted the outside as sturdy as possible...score the 12x12 @ 4 inches rotating the paper each time to get a tic tac toe pattern....the 9x9 @ 3 inches and the 6x6 @ two inches....cut the corner square from each piece of paper to make a cross....cut one of the 12x12's and then glue it to the other....use it as a pattern to cut the second piece.  I like to round my corners....my boxes are glued together at the center square at an angle...I like this much butter than stacked evenly...but you can do it either way...I use my xtra squares that I cut off the embellish the inside of my boxes.....the other 6x6 is now scored from the outside @ 3/4 of an inch...cut one side on each corner to fold in to make the lid.
The rest is the fun part....just embellish the way you would like to.....I have added sand to the top of my box and written my son's name in it...the blue stickles are spread across the  opposite corner...pushed up near the 'shore' to simulate waves....my message in a bottles says....'how do i love thee...let me count the waves.

My son dreams of becoming a marine biologist....so my Life's A Beach cricut cart was perfect for this project.

The center cuts are attached with wire and my glue gun....so much fun!
The interior of the lid holds my card and my bday message to my son.
So that's about it....please click on the link below to watch my youtube video for additional views...hope you like my project...can't wait to give it to him....so happy you stopped by today...enjoy the rest of your holiday weekend!

happy scrappin,
Sandy

Saturday, September 3, 2011

Inspired From Within....Explosion Box Card

 Happy Saturday everyone!  Today I would like to share an explosion box card I made for my sis.  She has been in the hospital and is not feeling well....so I hope this brightens her day a bit.
 The top of the box has one of my tutu cute blooms (tutorial @ Stuck on U Sketches, March 2011).  I added some fiber and a little tag that says "inspired from within".  The tag is computer generated, inked and curled.
 side view
 My sentiment is inside the lid....it says..."Happiness...it's an inside job!" and then a short note to my sis...the tag is computer generated, inked and curled...I added a stamp and accented with stickles.  The flowers are from prima and the die is the Sizzix clock die....I also glimmer misted the inside of the lid.
 This pic is a bit bright....the colors are really very rich.  The papers are from DCWV Once Upon A Time stack.
 another view
Hope and enjoy are cut from Wall Decor and More.
 Believe/Wall Decor and More....Faith/Home Accents
 Laugh/A Child's Year...Love/Wall Decor and More
 Forever/Home Decor....&/Heritage...all of my corner accents are from Heritage as well.
 Butterflies are all from Sentimentals.
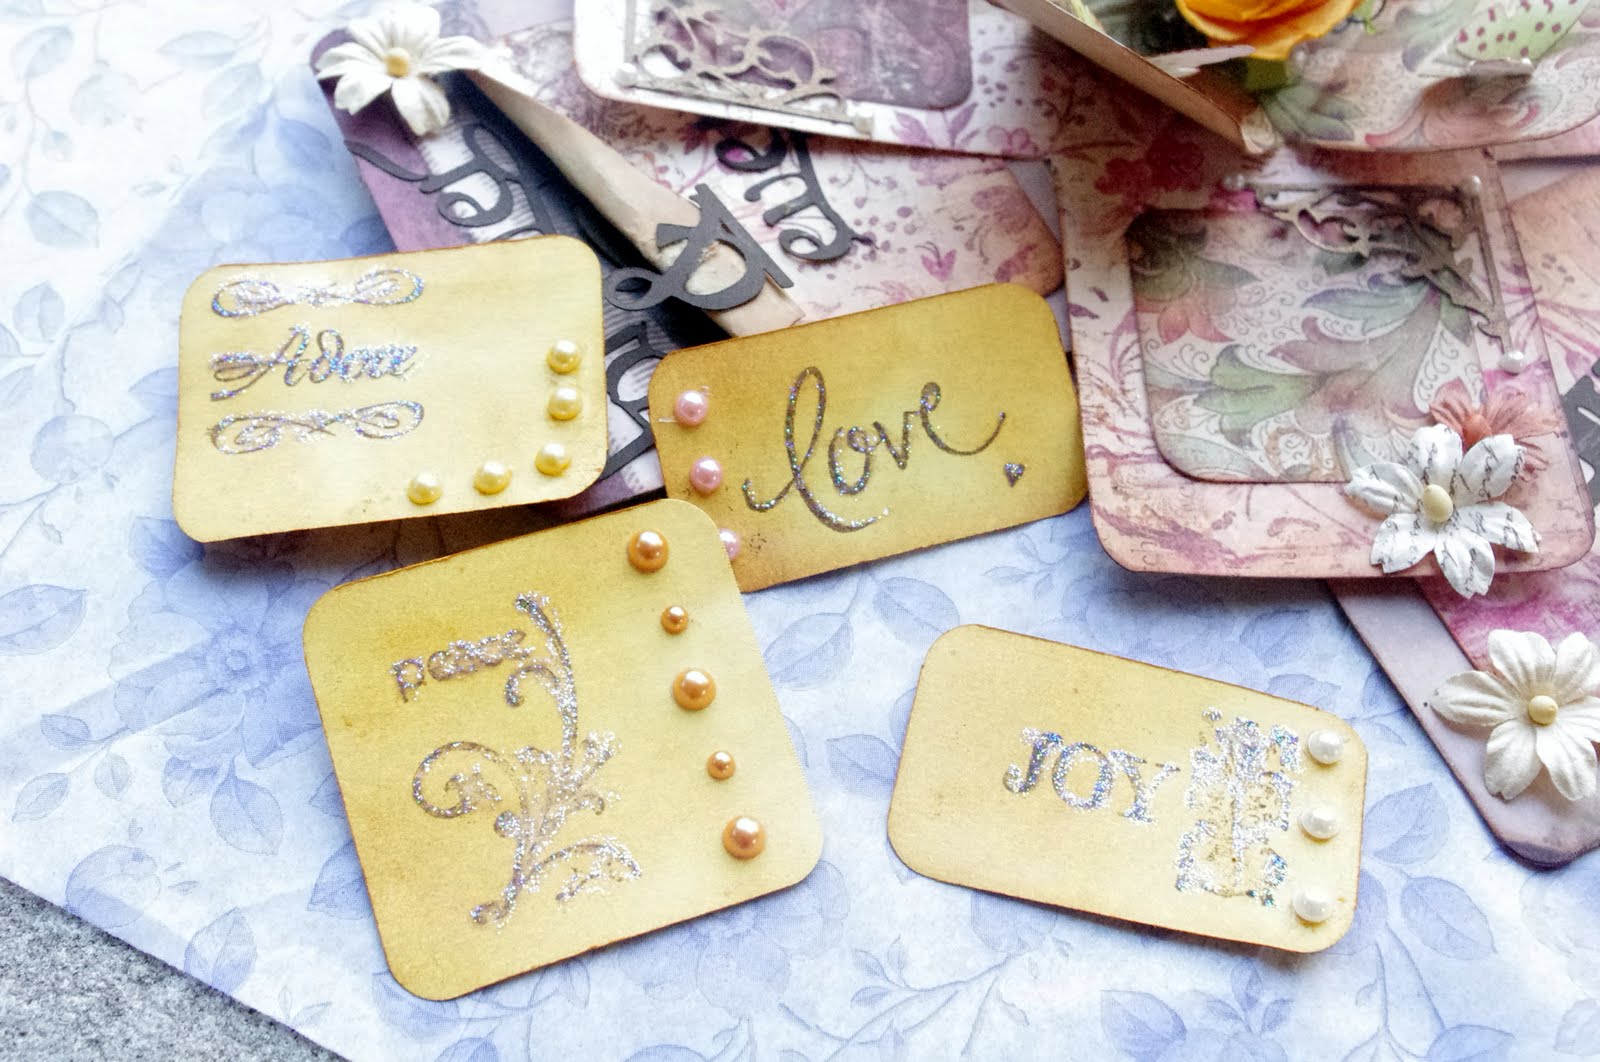
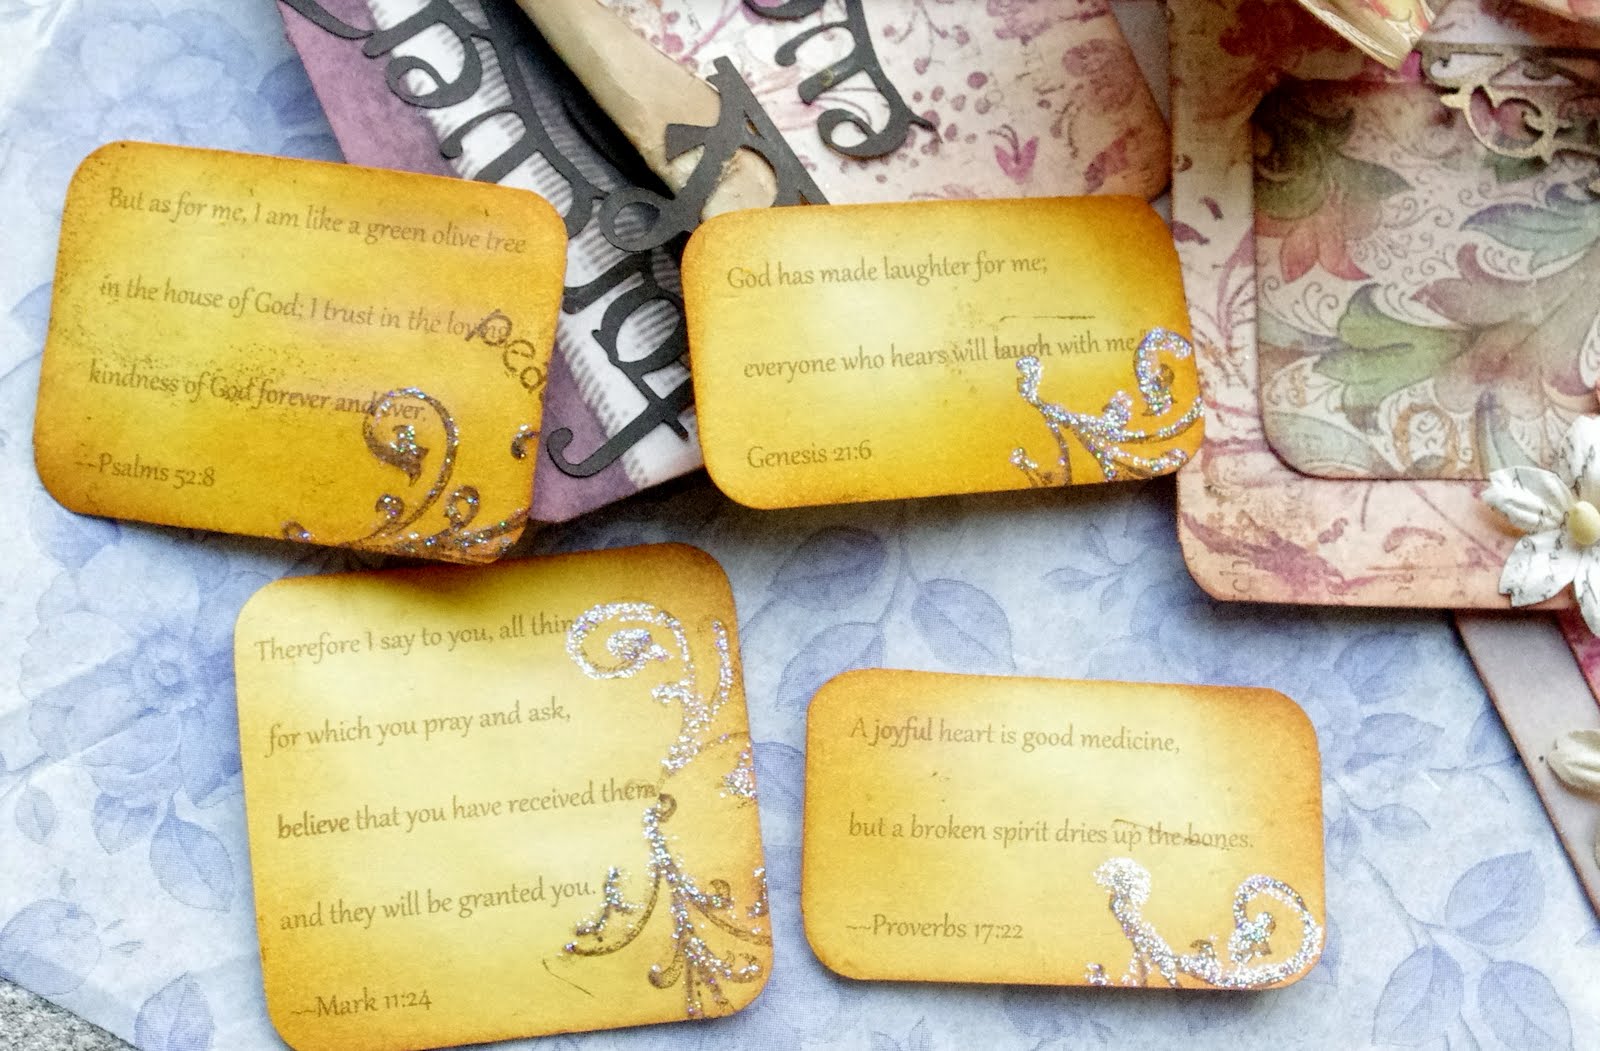
 My tags are inked, stamped, stickled and accented with adhesive pearls.  The stamp reflects the sentiment on the flap behind it.
The reverse of the tag has a bible verse that reflects the message of each word...believe, joy, faith and love and laugh.

Hope you enjoyed my little project...have a scrappy day!

Sandy

Saturday, August 27, 2011

Halloween Canvas

 Happy Saturday to each and everyone of you wonderful bloggy chicas!  How much fun are these simple canvas's made with my cricut Happy Haunting, Distress Inks and Paint Dabbers???
 Start this project by inking up your canvas in fun fall colors....I used Spiced Marmalade, Rusty Hinge, Walnut Stain, Wild Honey and Tea Dye....ink to your hearts delight.
 Using a script stamp (mine is from inkadinkadoo) I 'inked' up my stamp with Terra Cotta paint and stamped the script all over the canvas.  Next, I've used some cuts from Happy Haunting that make good 'stencils'...I chose spooky and beware....then using Butterscotch and Terra Cotta paint dabbers I placed them randomly on the canvas.
 You can see I did not try to achieve a 'perfect' stamp or stencil...the randomness adds to the look I was going for.
 This one is my fave....luv that crow.....I then cut my silhouettes from Happy Haunting and glued them in place
 Using a gel medium (similiar to mod podge, but much easier to work with, you can find this in the painting aisle at most craft stores) I 'painted over the entire canvas to both seal and add texture.
On this canvas I've also added a flourish stamp...again inkadinkadoo...to a couple of the corners.

Simple and fun fall decor....I will be doing a class on this one...can't wait....

I will be making kits up for the LSS in instruct at, as well as doing a ustream class on the banner....so excited for all the fun opportunities I have been blessed with....

Happy Scrappin,

Sandy

Saturday, August 20, 2011

Fall Banner

Is it toooooo early to start thinking of fall???  With all the 100 degree temps in SE KS the crisp autumn air will be so refreshing when it arrives....In anticipation of the coming season I created a fall banner.
I have Incorporated a ton of ribbons and fibers on my banner....toooo much is never enough...lol!
 I visited the Graphics Fairy and used some of her awesome vintage images to create charms.  If you've never done this before it is such an easy process...simply apply glossy accents to a Tim Holtz fragment...apply to image...smear around a bit and place on the part of the image you want on your charm...then just cut out...so much fun!  My letters are cut from Storybook...I've layered three of each, embossed, inked and then added some perfect pearls in green patina.
 Don't you just love the big harvest moon I found on her sight....I save the photos to my computer...inserted them into a word document...made them the size I wanted and printed out on photo paper...card stock will do in a pinch.
 I've also made charms from calenders from one of Tim Holtz's paper stacks...these are from the Lost and Found stash...I made charms from all of the months included in the fall season...and added charms that reminded me of the holiday we celebrate in each month.
 I made a little alpha charm from the same TH stash...q for quail...reminded me that school begins....I also added a charm that I made using a b/w photo of my boys....you can see it in the right corner.....
 The shipping tags and the chipboard leaves are both distressed with the same technique...I used fall colors in these distress inks for the tags...spiced marmalade, rusty hinge, and scattered straw...for the leaves I used those and wild honey, walnut stain, tea dye, forest moss and bundled sage.  Blot craft mat (i use a laminated placemat that I picked up at the $1 store) with the ink colors you want to use, being careful not to mix colors on your pads...then spritz with water and run tag or chipboard piece through them...Tim has the best techniques...after the tags dried I ran them through my cuttlebug with one of his embossing folders and then double distressed them with walnut stain, running the pad directly over the raised image and along each edge of the tag.  I added some of the green patina perfect pearls to the chip board leaves and finished them off with stickles.
 I also added a word tag by Tim and a heart trinket from FabScraps....please enjoy my video if you would like to see additional views.......thanx for stopping by today....

click on link to view video

Happy Scrappin,

Sandy

Just wanted to add some outdoor photos...last night i was in such a rush to post...these are a bit easier to see!


Wednesday, August 17, 2011

Grapic 45 The Magic of Oz Altered Book

 Hello everyone...I'm enjoying my last day of summer vacay relaxing at home with my son and working on some projects.  Today Mcauley assisted me in creating my first video for youtube.  We are a work in progress and promise to get better...but not bad for beginners...LOL!
I am so excited to share one of the projects I've been working on, this altered book with The Magic of Oz papers by Graphic 45.  I am going to be instructing an inspiration class for this book.  The store I work and instruct at is called Scraps and is located in Joplin, MO.  In light of the horrific tornado that struck Joplin this past spring we thought it would be appropriate to host a class for people to create a journal to remember their experiences and these papers were a perfect for such a book.
This is a close up of my poppies...created with my Serenade cart...the butterfly cut....using 2 butterflies...cut one in half the other in fourths....attach layers to a piece of cardstock cut into a circle...use the MS cornflower punch and some bling to create the center...add leaves from A Child's Year and some fiber.

click on the link below to see the video of this book
Altered Book/Graphic 45 The Magic of Oz


Happy Day....Sandy